
I have (had) an Apple AirPort Time Capsule which has been running reliably since before 2019. I don’t use it as a hub - it was plugged into my main hub so both my laptops had been backing up to it forever and Time Machine showed I had backups back to 2018.
Key files are also backed up to the cloud, but my TimeCapsule is hooked into everything; trusted to save it all.
Recently I noticed the device started to make rattling noises and was worried the hard disk was going. Then a flashing orange light on the device and the AirPort utility told me the device was overheating. Great I thought. Some searching on the problem revealed the internal fan is often to blame.
Apple do not make these devices any more and a visit to the Apple Genius bar told me that they could not repair it, only provide me a replacement at quite a cost. Not good.
I can fix it (or so I thought). I let the device cool down and then powered up and ran a backup which seemed to work, so maybe the disk is good.
Proceeding to dismantle the device following some web and Youtube instructions started well. There are plenty of instructions around. The iFixit website has some good instructions and this Youtube video shows a complete dissassembly cleaning and reassembly.
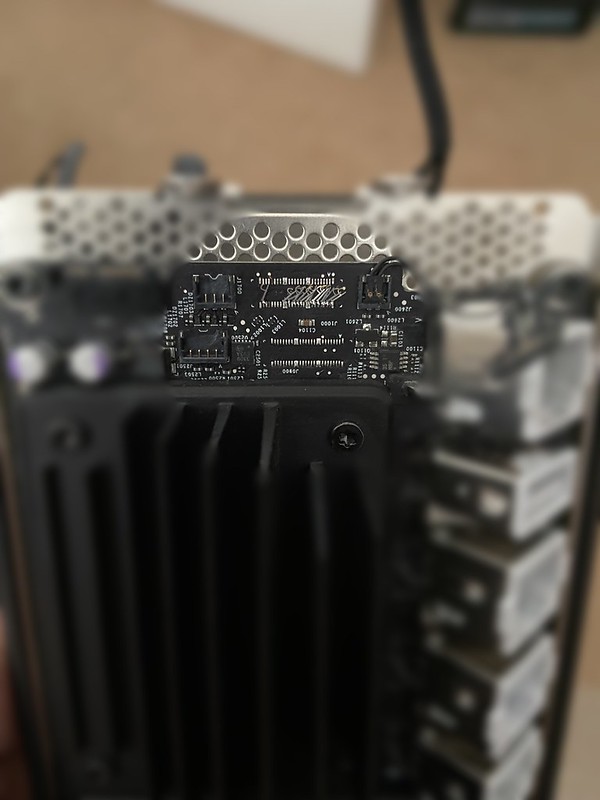
I came unstuck at about 7:15 minutes into the above video where you disconnect the hard drive from the logic board. In hindsight I should have followed the video’s lead and used some tweasers, but I didn’t and removing the connector ripped the pins of the board!
My Time Capsule was toast:
However, the hard drive was good, so how can I continue backups without starting afresh. I did not want to lose my backups going back to 2018/9 (depending on the laptop). I needed a replacement hard drive enclosure and there are a few available at reasonable prices. I opted for a Sabrent “tool-free” enclosure. Nice black aluminium finish, USB 3.0 support etc.
The device works a treat. It has three partitions and the internet wisdom seems to be leave them alone.
- APconfig
- APswap
- Data
Since I was backing up over the network, I wanted to access the backup on “Data”. Time Machine seems to need some help here because by default it wants to format the disk for Time Machine backups. You don’t seem to be able to select a .sparsebundle file from the “Select Disk…” option in Time Machine.
When backing up to a network share Time Machine creates a .sparsebundle file and stores everything in that. These “files” are actually directories if you look at them from the command line (hinted by a Show Package Contents… option when right-clicking the file).
If you right click on the .sparsebundle file you can mount it as another disk. Then use tmutil to update the destination for Time Machine (it was still waiting for the Time Capsule to appear on the network). The tmutil Time Machine utility has lots of extra functionality if you ever care to investigate. Type man tmutil from the command line to see what it can do.
I got my new destination working with:
sudo tmutil setdestination /Volumes/Time\ Machine\ Backups
(Change the /Volumes/ name above to match what yours is called)…then back to Time Machine and choose ‘Backup Now’ and it seems happy. I can now go into Time Machine a browse back to 2018/2019 for files.
Apparently from Catalina onwards, they have introduced a new filename extension .backupbundle and my .sparsebundle seems to have been renamed. Doesn’t seem to be a problem.
I currently eject the “Time Machine Backups” disk first, then the “Data” disk - which asks if I want to eject all (meaning APconfig and APswap), so I confirm that and the drive can be disconnected. Not sure what would happen if I ejected the “Data” disk before the “Time Machine Backups” disk. I don’t want to try it.
I would like to convert the disk into a “proper” backup disk, but with 2.75TB of data on there, I need to investigate how to migrate. For now, Time Machine is happy and whilst not as convenient as a networked device trusted to save it all, I can backup everything locally as well as key documents, pictures etc to the cloud.


Comments