
I have been printing for a while now and have found my optimal OrcaSlicer settings that produce great prints. For me, these settings:
- Produce quick prints;
- Produce quality FDM prints;
- Do not drag the nozzle across infill;
- Have reasonably accurate print-time estimates.
OrcaSlicer Settings
Fortunately in OrcaSlicer, you can compare different settings, which I have done here. Starting with OrcaSlicer’s stock “Creality Ender-3 S1 Pro 0.4 nozzle” printer profile, I tuned the settings. Here are the profile differences (my settings are on the left)
Printer Profile
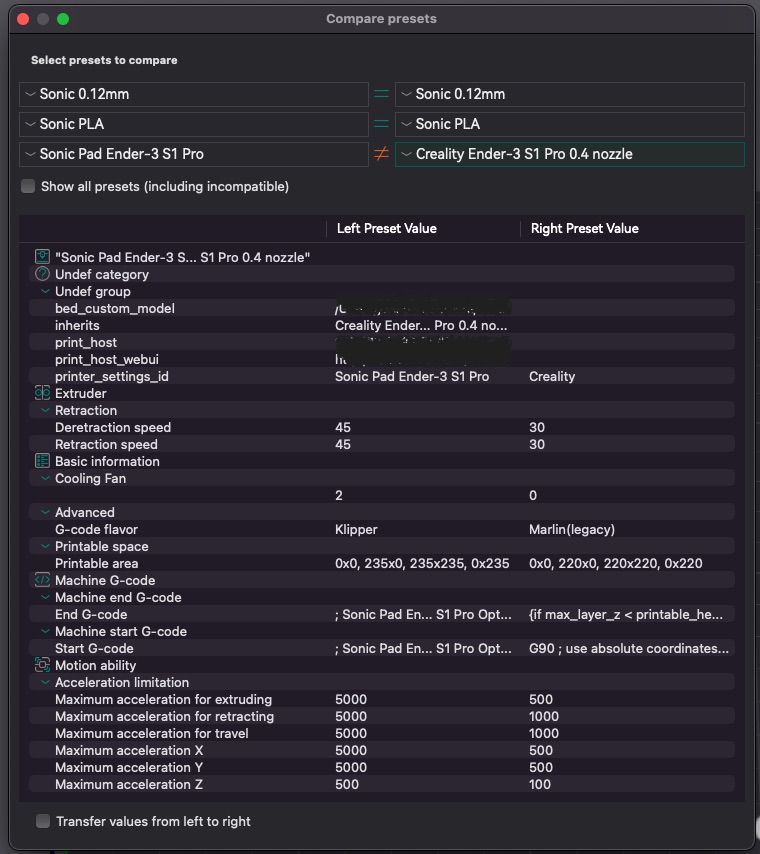
Some notes on these settings:
- Sonic Pad is Klipper based. So OrcaSlicer doesn’t output unknown commands (including acceleration control).
- My Start/End G-code is tuned. See here.
- The printer profile acceleration helps OrcaSlicer estimate print time which gets me to about 10% accuracy (OrcaSlicer estimates 9h41m and actual print time was 10h37) which isn’t bad. As Klipper is set above, acceleration commands are not sent to the Sonic Pad.
I may tune acceleration settings down (the printer rarely reaches 5000 acceleration in reality). This would make the estimates longer and more accurate. For example, a XenoMorph egg (see print results below) estimates at 9h41m using acceleration settings of 5000. The actual print time is 10h37m (10h40m total). A quick change to 3000 results in an estimate of 10h38m which is very close to the my observations. However, this may not be true of all prints so more testing is required.
Filament Settings
Filament settings for PLA are much the same as stock:

Not much to see here.
- Increased maximum volumetric speed to 16.25 to allow 200mm/s extrusion on infill.
- 40mm/s minimum speed stops overhangs from being too slow (I have lots of cooling airflow – Taurus V5 part cooling plus Creality fan cooling kit).
- Everyone tweaks the print temperature for their selected filament brand.
Print Settings
Finally the printing profile has many more tweaks. As above my tuned values are on the left (this is for 0.2 height but 0.12 and 0.28 are the same except for layer height):
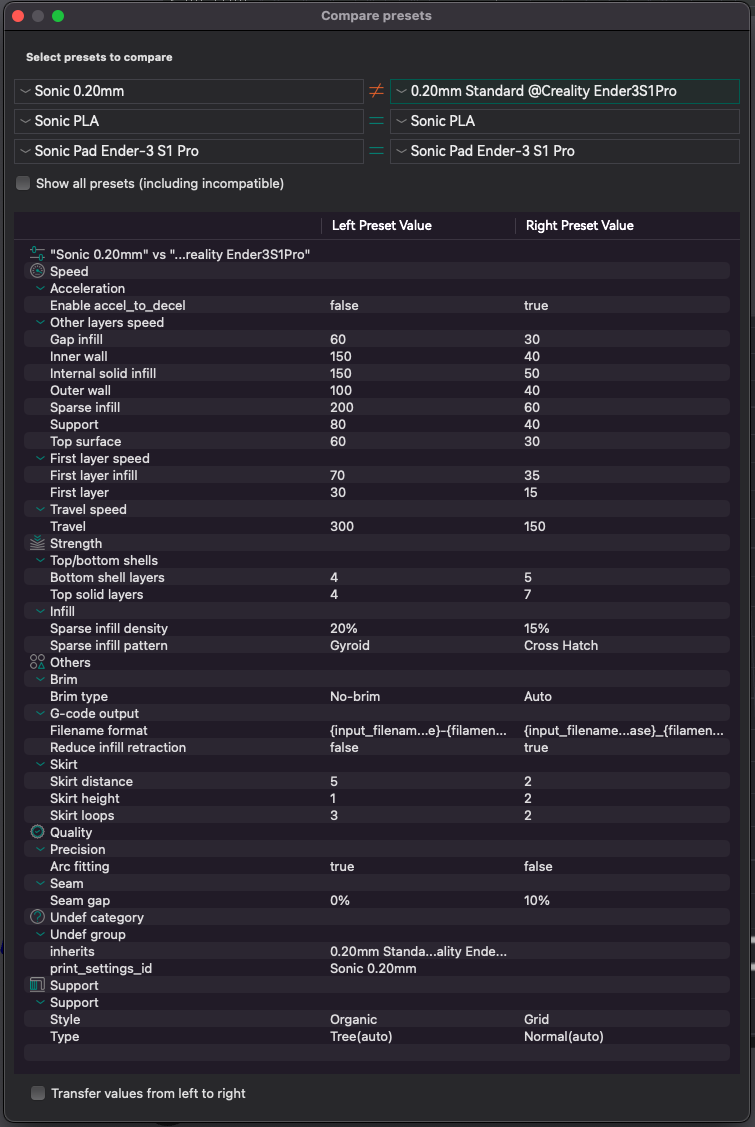
Many more tweaks on the printing profile:
- Speed increased to sustainable rate (ie. not speed Benchy speeds). Unless you reduce the walls and top bottom layers and layer height to 0.28 then speed Benchy doesn’t change much with higher speeds (it’s too small). My settings with a 0.28 layer heights gives a Benchy in about 35 minutes. Good enough for me.
- Disabled acceleration to deceleration. Also, (not shown here) ensure the normal printing acceleration is 0.
- First layer speeds are double stock vs other layers at 3-4 times stock.
- Moves at 300 aren’t a problem if you have your belt tension just right.
- Gyroid infill is best to avoid nozzle hitting infill of previous layers. I noticed mine was at 20% but I always change that depending on the print. NB: After taking these screenshots, I have returned the Sparse infill density back to 15%.
- I enabled arc fitting for smaller G-code. Not sure if it improves accuracy.
- Skirt and brim settings are personal preference.
- Seam gap is 0%. I have dialled in the printers e-steps, acceleration, pressure advance etc and I found a seam gap was very pronounced at 10% stock value.
Nozzle Drag
When printing, I find it useful to have Z hop enabled. This avoids the nozzle dragging across the print during moves, knocking it from the bed.
Z hop settings can be found under the printer profile on the Extruder tab Search for Z hop when retracting and Z hop type. Mine are set (to the default 0.4 mm and “Normal” type). Note here the setting is when retracting…
A key find for me was the Reduce infill retraction option - found under Print Settings and buried in the Others tab under G-code output. My stock Ender 3 S1 Pro profile has this enabled.
I disable this setting.
Enabling this setting stops retraction when the nozzle crosses infill. The idea being that stringing across infill doesn’t matter and your print will be slightly faster.
However, this also disables Z hop on retraction! The slicer does not retract and because it is Z hop on retraction this also means there is no Z hop. No retraction across infill means no Z hop on retraction means no Z hop across infill and the nozzle drags across the print.
So Z hop over the infill is better than hitting the infill – even with a little extra time retracting.
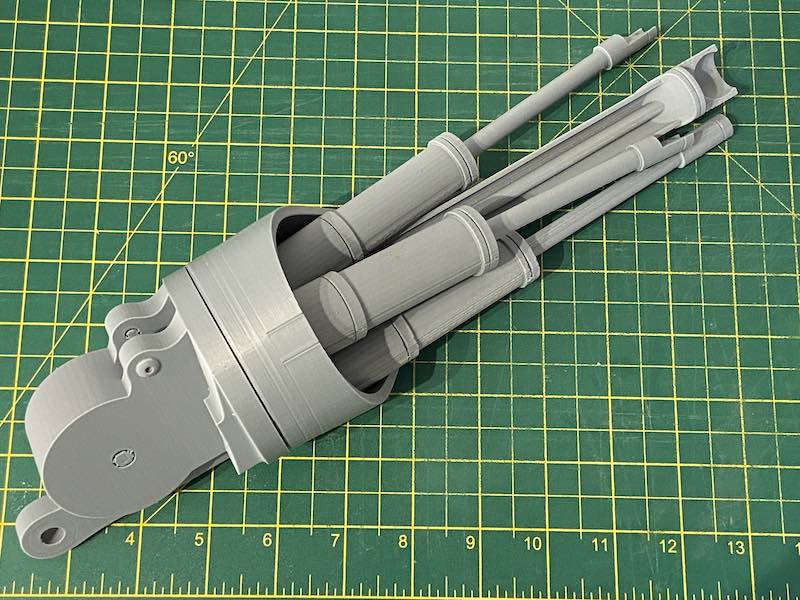
Print Results
Here is a comparison of these settings to a (not detailed) resin model print. FDM won’t match resin for very high quality models such as miniatures or figurines. Resin is super smooth and detailed for these. I used this resin model as a benchmark. For FDM printed at 0.12 layer height it’s pretty good.

Some say when painted all the layer lines will stand out. I have undercoated and so far no significant layer lines are showing.
Slicer Start/End G-code
One annoying thing I found with the stock start/end G-code in each slicer was they had a tendancy to ooze filament over the centre of the bed after homing. By default, start G-code heats the bed and nozzle after homing. But the G-code leaves the nozzle in the centre before moving to the purge line location to prime the nozzle. I tuned the start/end G-code so it heats the bed and warms the nozzle to 150 degrees whilst homing. I have a glass bed so don’t feel the need to create a bed mesh for minor warping.
Whilst I have switched to OrcaSlicer, I also produced equivalents for Prusa and Cura.
You may note the M117 G-code commands are commented out. If you are running custom firmware such as ThomasToka with a stock touch screen (I don’t any more having switched to a Sonic Pad), uncommenting these (remove the semi-colon at the start) will output the message to the touch screen.
Comments