
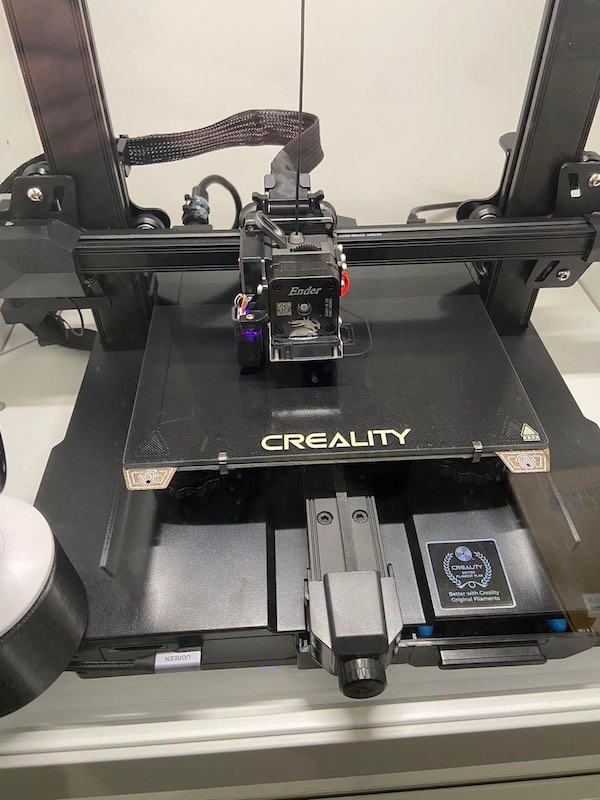
I recently bought an Ender 3 S1 Pro 3D printer. I’ve been “dialling it in” (tuning it) over the last few weeks learning as I go. Hopefully these notes might help others having trouble with adhesion or good prints. Especially as the Z-height was best when lower than I expected.
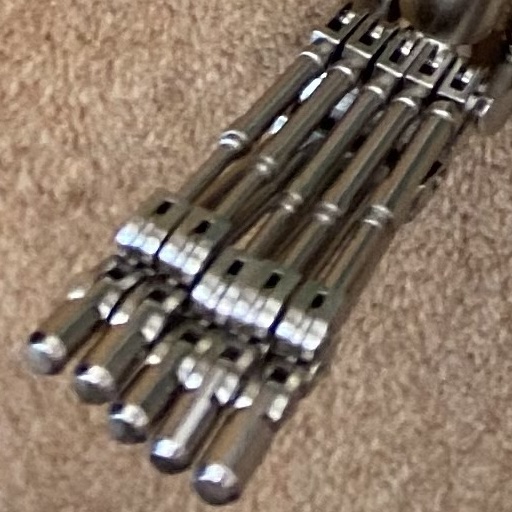
I’ve printed a few things (mostly for the printer), but what I wanted to print was a 1:1 scale endoskeleton arm and chip from Terminator 2.

Two main types of home-use printers are available; Fused Deposition Modeling (FDM) and Stereolithography (SLA - more commonly known as Resin). An FDM printer “does what is says on the tin” - melt and deposit layers of material that fuses together to make a 3D model. Stereolithography printing uses UV light to solidify chemicals into a resin.
For FDM 3D printing, the process is relatively simple. However, generating reasonable prints using FDM can be challenging, but fun! The basic process is:
- Create or find a “Standard Triangle Language” (STL) file of what you want to print. An “STL” file contains a 3D model made from triangles. Enough triangles combined together can form any shape.
- Run it through a “slicer” software. This turns the STL file into Geometric Code (G-Code) that tells a machine what to do layer by layer
- Load the G-Code file onto the printer and go. Watch as your print “grows” from your printing plate.
The Ender 3 S1 Pro comes partially assembled. You need to carefully put it together, ensuring everything is true and at right-angles. Having the grantry, bed or frame out of alignment, or loose will cause poor prints or failures. Attempting to tune a printer with these problems will have you going round in circles.
I found Ricky Impey’s channel extremely useful. I used lots of advice from there. Some great videos. You should check them out. This first video of his describes the basic elements of a cartesian FDM printer:
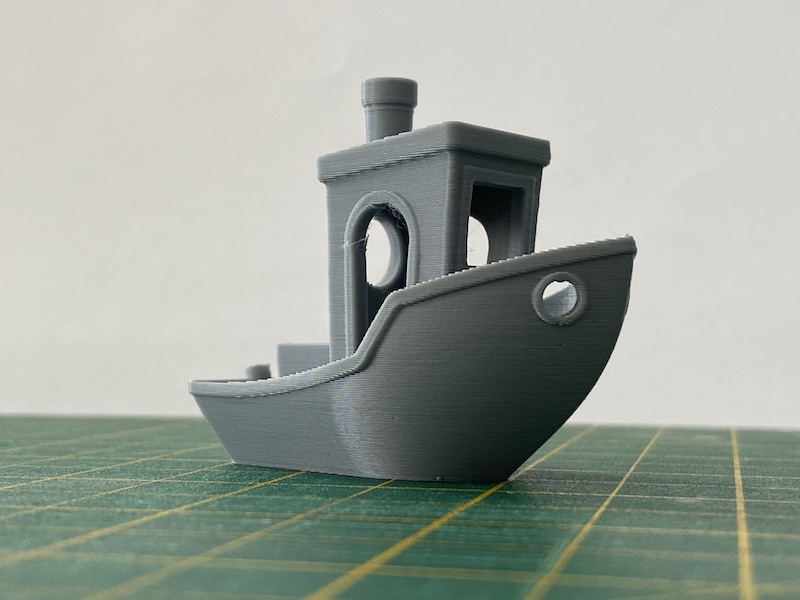
Once my printer was assembled and I got a couple of sample prints out of the way. Here’s the approach I took to dial in my printer, resulting in a decent Benchy print:
0. Firmware Upgrade (Optional)
Upgrading is a purely optional step unless you have a specific problem and Creality direct you to do so. A few times, my Ender reset itself whilst I was using the touch screen, so I decided myself to upgrade. The latest firmware supports a laser engraving head and I thought I might try that at some point anyway. Now was as good a time as any to upgrade.
There are two elements to upgrade. Upgrade the screen first and then the printer motherboard.
- The touch-screen. This requires opening up the back of the screen case and inserting a micro-SD card with the screen’s firmware.
- The printer’s motherboard. Copy the upgrade onto the supplied SD card provided with the printer.
See the Creality Ender 3 S1 Pro download page for the latest firmware files and instructions. Ignore their video which does the base first then the screen.
0.0 Ender-3 S1 V2.1.2
After updating I noticed some touch screen updates did not work. I have a Mintion BeaglePrint camera. I don’t know whether the same problems occur with OctoPrint, but some controls on the touchscreen don’t work when printing from the BeaglePrint. For example, the percentage complete does not update, thought fortunately the bed and nozzle temperatures do.
I recently found a later version 2.1.2 of the firmware with useful additions on GitHub. Version 2.1.2 was built from the official Marlin repository. It also incorporates the touchscreen handling Creality. Additionally, it includes a bunch of enhancements, some of which I like the look of. See synman on GitHub for details.
I plan to try this out soon.
NOTE: Laser functionality is untested and not supported with this 2.1.2 update. It may work with the 2.0.8 firmware but will very likely fail with 2.1.x
1. Bed Levelling
The biggest job (and one many people seem to struggle with) is levelling or “tramming” the nozzle parallel to both the X- (left-right) and Y- (back/forward) axis. This is nothing to do with making the bed “level” to your floor, the ground or anything. It’s all about ensuring that movement of the nozzle remains the same distance from the bed as it moves around the X and Y axis.
I used a 0.1mm (4-thou) feeler guage, available cheaply from the Internet or you local car parts store I am sure. People can use a sheet of paper which is also 0.1mm thick.
When levelling a glass bed with the feeler gauge, I could feel the nozzle pull on the feeler guage at -2.15mm. Yours will be different as this depends on the distance from the CR-Touch bed sensor and the tip of the nozzle. If you have to replace the nozzle or disassemble the heat block in the extruder (e.g. to deal with a clogged hotend), then when reassembled, the tip may be differently aligned (even very slightly).
See the two bed levelling videos by Ricky. The first link helps if you bed is badly misaligned (mine wasn’t - lucky me).
The second shows how to relevel simply and quickly if your bed is basically level and you have just knocked something, or dealt with a clogged hotend or replced a nozzle.
Don’t forget to add M420 S1 Z10 (perform an automatic bed level so M420 can retrieve it) or G29 (which performs an ABL every print) into your custom start g-code. Without one of these your automatic bed levelling will not be used. See my custom start g-code below which includes the necessary M420 command.
2. PID Tuning
I have seen a few people on Facebook forums say “PID Tune!” to any problem people have with their printers. Initially, I had no idea what it was. PID tuning adjusts parameters the printer uses to heat the nozzle and bed and keep the temperature stable. PID tuning helps stop the heat process from overshooting and undershooting. It’s aim is to keep the temperature more stable during printing.
I purchased a glass bed and did not want to remove the underlying magnetic layer for the supplied PEI plate to stick to. Some people showed damage when laying the glass bed directly onto the magnetic layer, so I wanted the magnetic layer, PEI plate and then glass bed. This means the temperature on the bed will take longer to heat up.
Additionally, I had upgraded the firmware, so a PID tune is recommended by Ricky. I used pronterface as I don’t have OctoPrint.
To be perfectly honest, I am having doubts about PID tuning. It may be that I am watching the temperature more closely than before, but it does appear to overshoot and then underheat more before becoming stable with modified values. I could return to the original values I saved first and do some comparisons. Once stablised, the temperature does appear to remain just as stable as before PID tuning.
3. E-Steps
E-steps configure the amount of filament drawn into the extruder. By default the printer expects a number of extruder stepper motor steps (E-steps) to draw in a defined amount of filament (e.g. 10mm). The idea is to determine how much is actually drawn in for 100mm and then update the e-steps based on whether this is more or less than the 100mm expected. Thus when the printer wants filament and turns the extruder motor X e-steps, the expected amount of filament is drawn in.
When I checked my e-steps, they were ok. Just lucky I guess. Here’s Ricky’s guidance.
4. Flow Test
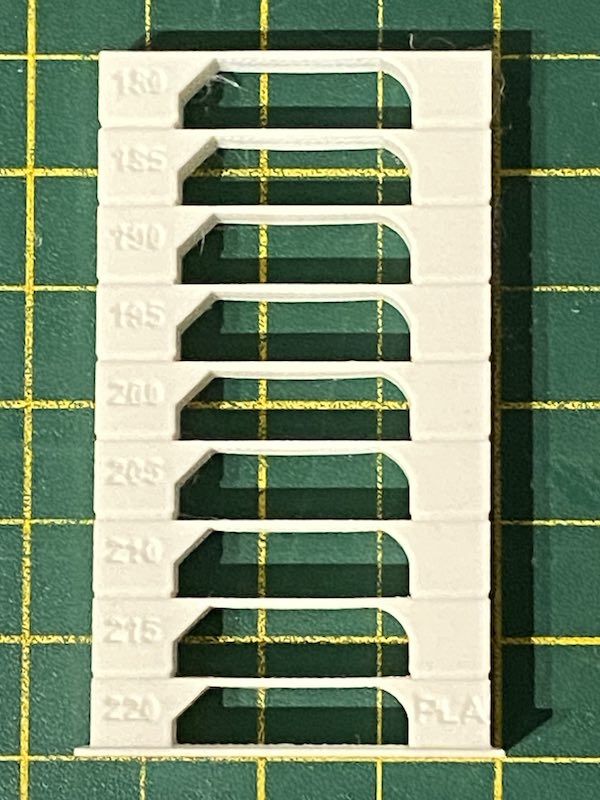
Whilst playing with flow test I was trying different nozzle (Z-)heights. The pictures below are of the underside of test cube sliced in Cura 5.2.1. A 20mm test cube with 1 or 2 wall line count and 0 infill only takes 20 minutes to print. Once cooled, this flow cube allows you to measure the wall width and calulate required flow rate.
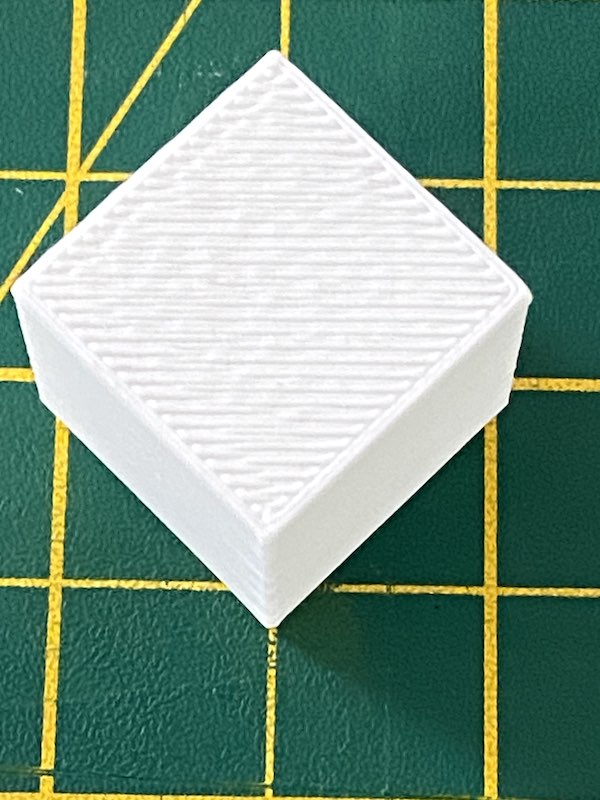

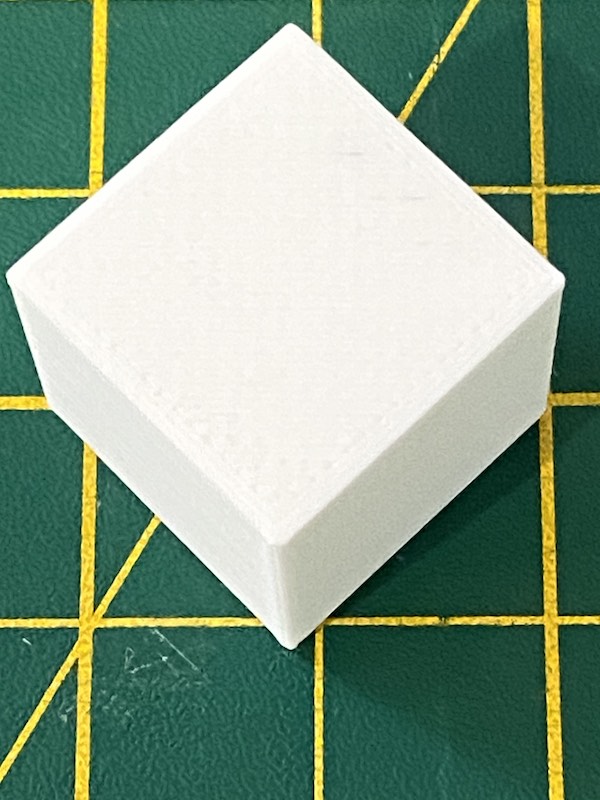
The 1st white cube is created by a z-height of -2.25 (the feeler guage setting). 2nd is -2.35. 3rd is best at -2.45 but the top was a bit rubbed by the nozzle so went with -2.40. Nice smooth base. I learned you can go down quite a lot from the feeler gauge setting.
With my flow, it appeared slightly under at .38 for a .4 Nozzle. So I tested the flow at 105.3% and then 107.9% to see what works best. Ended choosing 105.3% as 107.9% was almost .5mm from a .4 nozzle.
Ricky’s flow rate guide made this process very easy:
5. Filament Temperature Tower
Next I checked for the best filament temperature but I got the same results across all temperatures. It was definately changing temperature as I printed - I could see the temp change in the printer.
Ricky’s guide on how to use the latest tools in Cura to create a temperature fan tower as ever are very clear.
6. Nozzle Oozing
Whilst performing all these tuning operations, I got tired of filament oozing over the print area during homing etc. By default, Creality and Cura sliders heat the bed and nozzle to temperature and then home the X-Y-Z coordinates. Homing on my Ender 3 S1 Pro involved checking the Z height in the centre of the bed. Melted filament had a habit of dropping directly where the print was due. Not nice.
So, I wrote my own custom start/end code after understanding what Creality, Cura and Prusa had. You copy & paste the sample code here into your slicer program of choise. Choose the right one if you are using Creality/Cura or PrusaSlicer/SuperSlicer.
I use Cura mainly, but I also produced an equivalent for Prusa. Pruse already pre-heats the nozzle so it does not ooze over the print surface.
After all that I got a good Benchy so on with my real prints…
Comments